Snaps with Eclipse Che
Eclipse Che is a cloud based IDE that allows you to develop and deploy from within a web browser, and snaps are a universal linux package that can run on any distribution or device. Combining these together allows you to almost develop from anywhere and remotely deploy to anything. This is really cool for IoT, as there are loads of snappy machines, e.g. Raspberry Pi, that can be deployed to.
To push an update, all you need to do is click snap&run in the IDE, and it will automatically run snapcraft to build a snap, install it on your snappy device, and then run it returning back the output. When a release is ready, clicking snap&push will upload it to the ubuntu snap store.
The code so far is more of a fragile proof of concept, but it is enough to see the potential in this idea. It currently works by having an external agent run on the endpoint device you want to deploy to, which communicates to the Eclipse Che API. For a final implementation it would be better to create an Eclipse Che Extension.
Quick Walkthrough
Setup Eclipse Che
Firstly, to try this out you need to be running Eclipse Che somewhere. The simplest is to sign up to a codenvy account for free at beta.codenvy.com to use their hosted version of Eclipse Che, or you can also host it yourself. Remember it needs to be accessible by your snappy device.
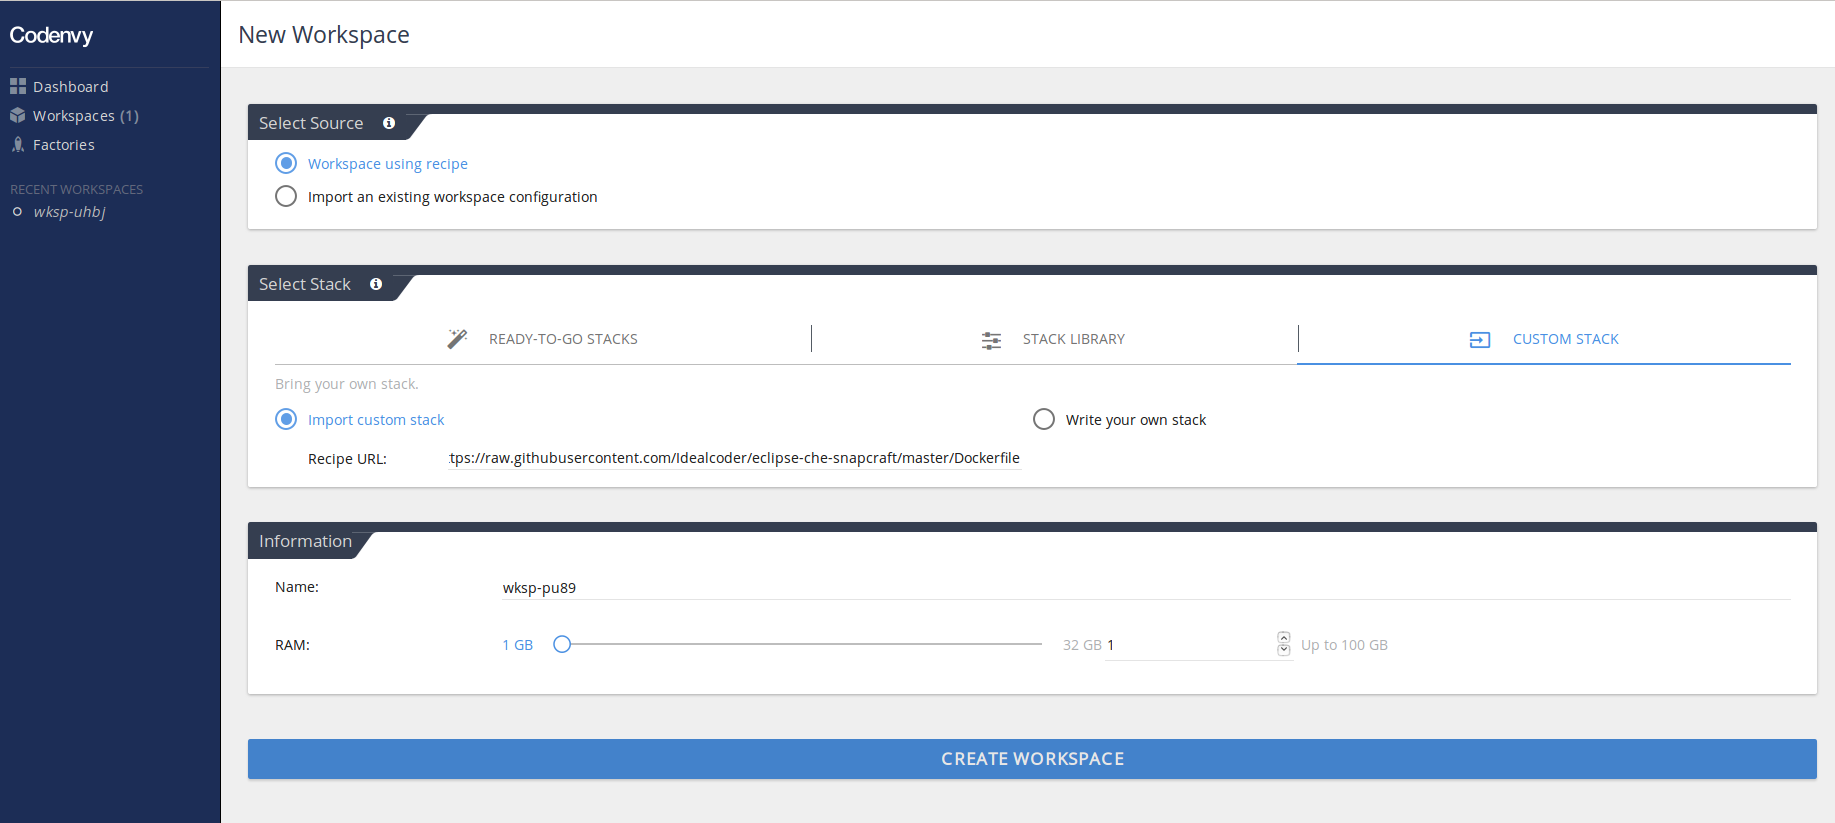
Then you will need to create a workspace for your project. By using a custom recipe all the tools needed are included * Open up the Eclipse Che IDE. * Create a new workspace using custom stack * Recipe URL: https://raw.githubusercontent.com/Idealcoder/eclipse-che-snapcraft/master/Dockerfile
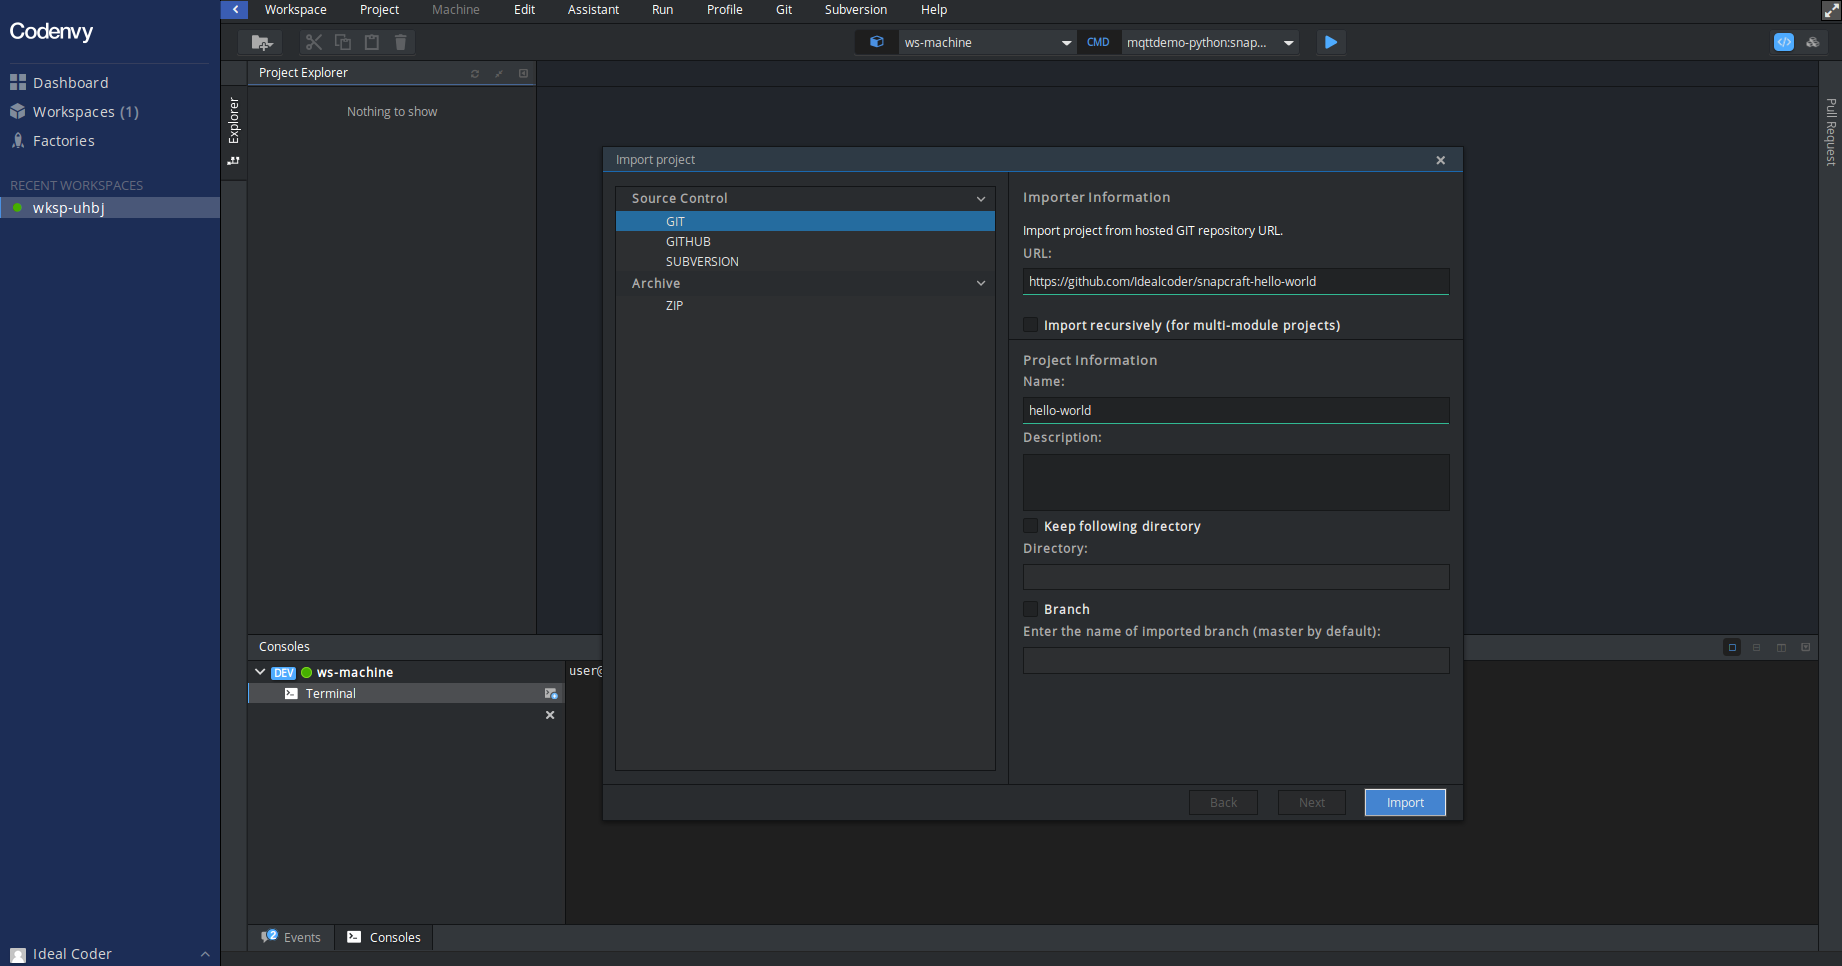
Add a snapcraft project to the workspace, e.g. https://github.com/Idealcoder/snapcraft-hello-world Note: You can have multiple projects per workspace.
Setup snappy device agent
Next you will want to install the agzaent on your snappy device. This can be anything that is able to run snaps, e.g. Ubuntu 16.04. You need to have go installed, and then install snapcraft and the agent. Root is currently needed to have permission to install snaps
$ sudo apt install golang snapcraft
$ go get github.com/Idealcoder/che-snap-agent
...
$ sudo che-snap-agent
If it says command not found: che-snap-agent you might need to configure your go path.
On first run, it will ask for URL of the Eclipse Che IDE to connect to, e.g. https://beta.codenvy.com, and credentials if they are needed. If there are multiple snap workspaces it will ask to select one as well. Finally, if you want to be able to push to the ubuntu snap store, you should run snapcraft login on the device and authenticate (needs a Ubuntu One account).
Usage
za
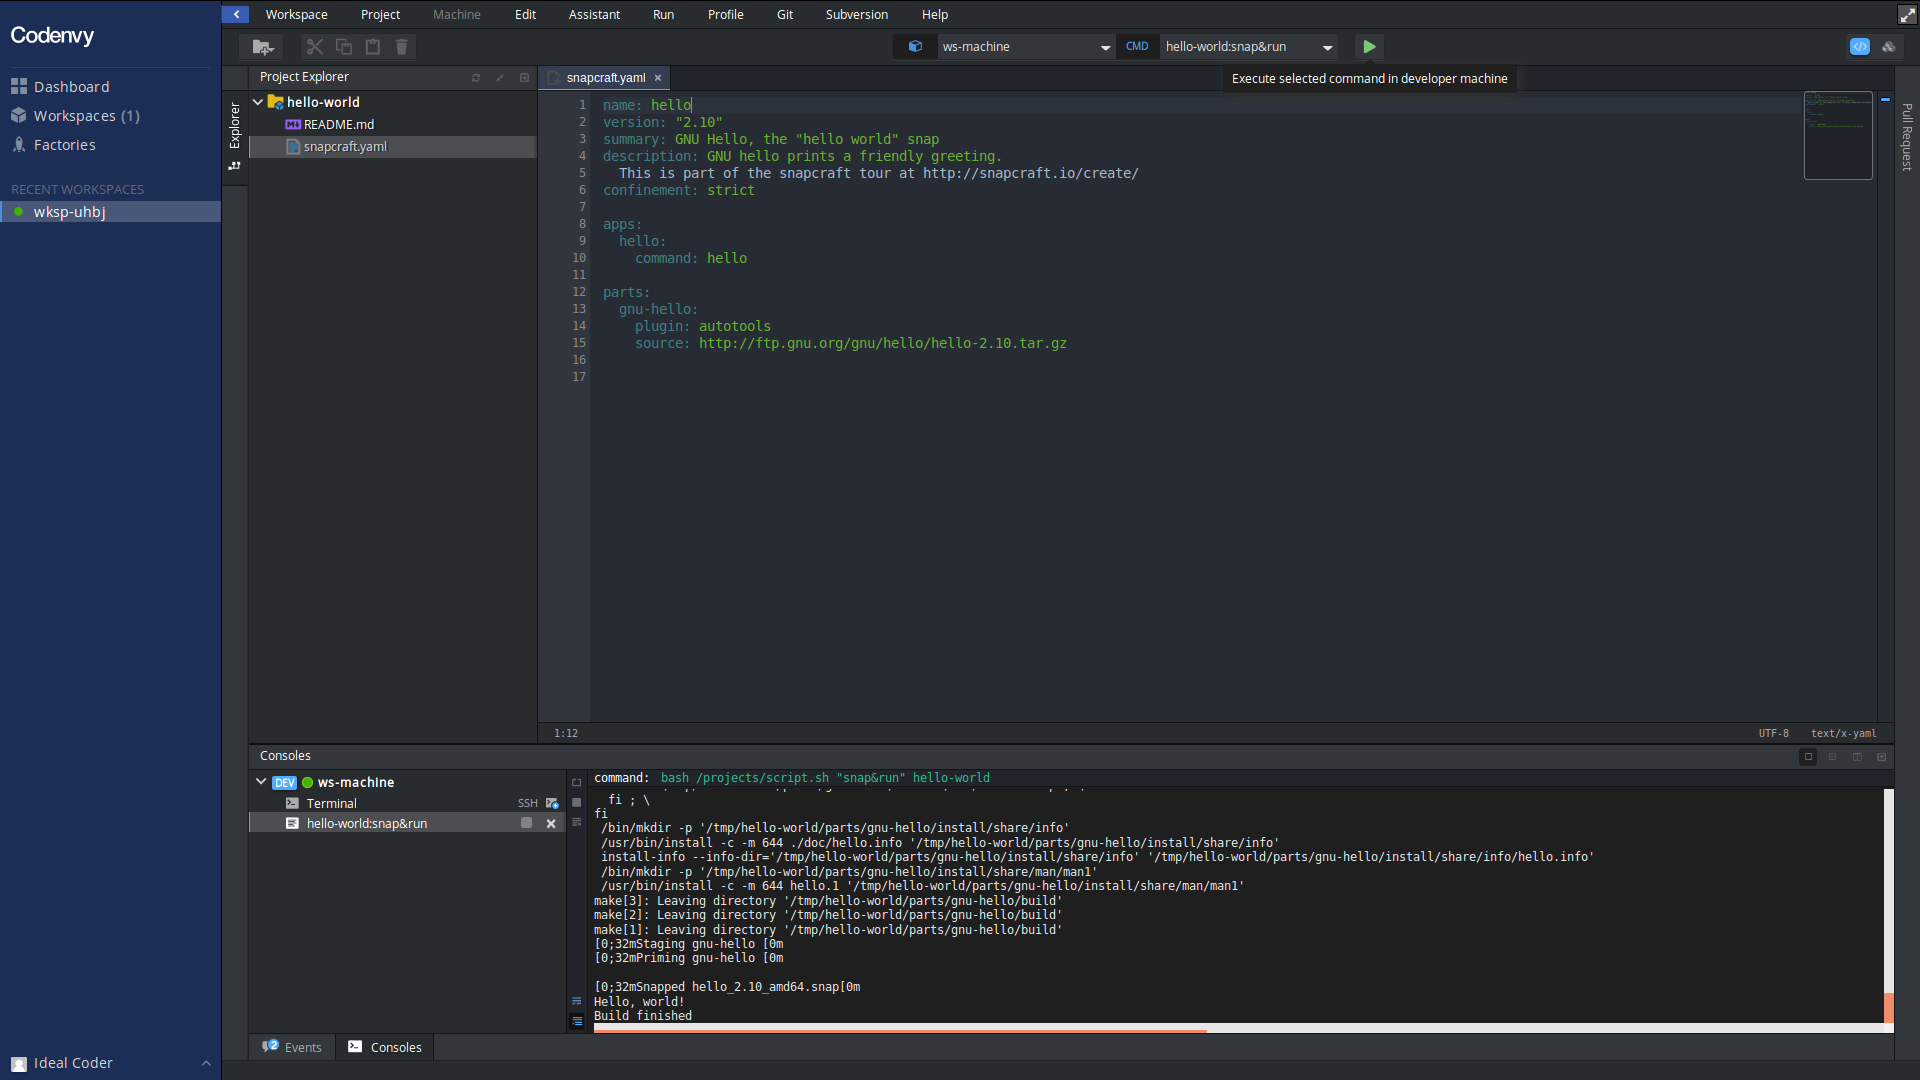
Switch back to the Eclipse Che IDE and refresh the page. The commands to snap&run, snap&push should have been added for each project. If you used the hello-world example as you project, then executing snap&run should look as below, showing Hello, world! as output line if it all worked.
Limitations & Conclusion
As its early days, there are some problems that haven’t been fully solved yet.
- Crashes if concurrent builds for same project set off.
- If a new project is added, agent and Eclipse Che IDE need to be refreshed
- ANSI Colour codes not working, so terminal is only black and white
- Code pulled from git so changed need to be committed each time
- Snapcraft.yaml file expected to be at root of repository
- Agent runs as root so it can install snap
- Username/Password for Eclipse Che stored in plain text as apikey only lasts 24 hours.
- Apikey only refreshed on startup, so agent has to be manually restarted every 24 hours
- Snap&push option requires user initially register snap name on store
That said, it’s really cool to have a go and see the workflow of being able create and run snaps. For more information on how this project works, see snaps-eclipse-che.